Sublimation File Formats Explained: PNG, SVG, JPG and DPI
Understanding sublimation file formats helps you choose artwork that opens correctly, fits the intended print and supports the edits you need. A PNG, SVG or JPG can serve a useful purpose, but its extension does not tell you everything about transparency, detail or personalization. Use this guide to compare the formats, calculate a raster image’s size from its pixels, and inspect the actual download before building a layout for your blank.
Quick Answer
- Use PNG for raster artwork when you need transparency, but verify that the supplied file actually has a transparent background.
- SVG can preserve scalable vector shapes; inspect whether it also contains raster images or lettering that is no longer editable text.
- JPG and JPEG refer to the same common image format. It does not support a transparent background and uses lossy compression.
- Calculate raster requirements from physical size: width in inches × target PPI equals the required pixel width; repeat for height.
- A 300 DPI label does not guarantee a large sharp print. Check pixel dimensions, intended placement and compatibility with your software.
In this guide:
- Choose the Format for the Job You Need It to Do
- Inspect the Background Instead of Assuming It Is Transparent
- Check What an SVG Actually Lets You Change
- Calculate Print Size From Pixels, Not a DPI Label
- Preserve Proportions and Recognize the Limits of Resizing
- Open the Actual File and Build a Final-Size Proof
- Checklist Before Using a Sublimation File
- Frequently Asked Questions
Choose the Format for the Job You Need It to Do
Begin with the layout you want to make. A finished watercolor graphic, a name you plan to replace and a photograph covering a panel place different demands on the file. Read the actual included-file list rather than treating a preview image as the download. The preview can contain a mockup, background or sample name that is not part of the supplied artwork.
| Format | Transparency | Scaling and editing | Useful choice when |
|---|---|---|---|
| PNG | Supports alpha transparency; it may still contain an opaque background | Raster pixels; inspect native dimensions and flattened lettering | You want a finished illustration without a rectangular backdrop |
| SVG | Can contain transparent areas | Vector shapes can scale; embedded raster images remain pixel-based | You need adjustable shapes or confirmed editable elements |
| JPG / JPEG | No alpha transparency | Raster pixels with lossy compression | You want photographic or full-background artwork and accept its backdrop |
These formats describe how an image is stored, not whether it fits a particular sublimation blank. A square PNG can still need a crop for a round accessory, and a scalable SVG may need a completely different arrangement for a wide mug wrap. Keep file suitability and physical layout as two separate checks.
Inspect the Background Instead of Assuming It Is Transparent
Transparency matters when you want only the illustration in your layout. A PNG can preserve it, but saving a white rectangle as PNG does not make the white disappear. Inspect the opened artwork in your editor against a contrasting temporary background and check its edges. A checkerboard visible in a preview is a clue, not proof of the delivered file’s contents.
For a photographic panel or an intentional rectangular scene, an opaque background may be exactly what you want. The important question is whether that shape belongs in the finished composition. Avoid selecting a file merely because transparent appears in the title when you actually need an edge-to-edge scene, or accepting a backdrop when you wanted isolated clipart.
Compare the mug artwork selection by composition: a complete wrap and a central illustration solve different layout problems. On the small keychain designs, check whether the supplied image already includes a shaped background or needs to be fitted into your blank’s outline.
Check What an SVG Actually Lets You Change
An SVG can describe vector paths and shapes, which are useful when resizing simple lettering or line art. It can also contain an embedded PNG or JPG. In that case, enlarging the SVG container does not turn the embedded photograph or watercolor image into vector detail. Inspect the contents in software that supports the file, rather than relying on the extension.
Check personalization separately. Lettering might remain a live text object, require a particular font, or have been converted to outlines. Outlined letters behave as shapes; they are not a ready-made text box in which you can simply type a new name. A flattened PNG version may be convenient for printing the supplied message while offering little control over its individual parts.
Before choosing a personalized gift, identify the specific change you need: replacing a name, recoloring a motif, removing a phrase or moving an illustration. Confirm that the download supports that change in your application. Do not plan to remove lettering from a complicated finished image unless you have an appropriate editable source or a separate version without the words.
Calculate Print Size From Pixels, Not a DPI Label
Pixels are the image’s actual raster dimensions. PPI describes how many of those pixels are assigned to each inch at the chosen print size. Printer DPI concerns the printing device’s dots and is not another name for the image’s pixel count. Download descriptions often say 300 DPI when discussing artwork resolution, so check the numbers that establish its usable size.
| Intended print area | Calculation | Required pixels |
|---|---|---|
| 4 × 4 in | 4 × 300 on each side | 1200 × 1200 px |
| 8 × 10 in | 8 × 300 and 10 × 300 | 2400 × 3000 px |
| 10 × 12 in | 10 × 300 and 12 × 300 | 3000 × 3600 px |
These are arithmetic examples, not universal blank sizes or a substitute for your printing workflow’s requirements. At 300 PPI, a 600-pixel-wide image spans 2 inches; a 3000-pixel-wide image spans 10 inches. Use the actual printable width and height for your project. Also inspect how much of the image is empty margin, because the visible motif may occupy only part of that pixel area.
Preserve Proportions and Recognize the Limits of Resizing
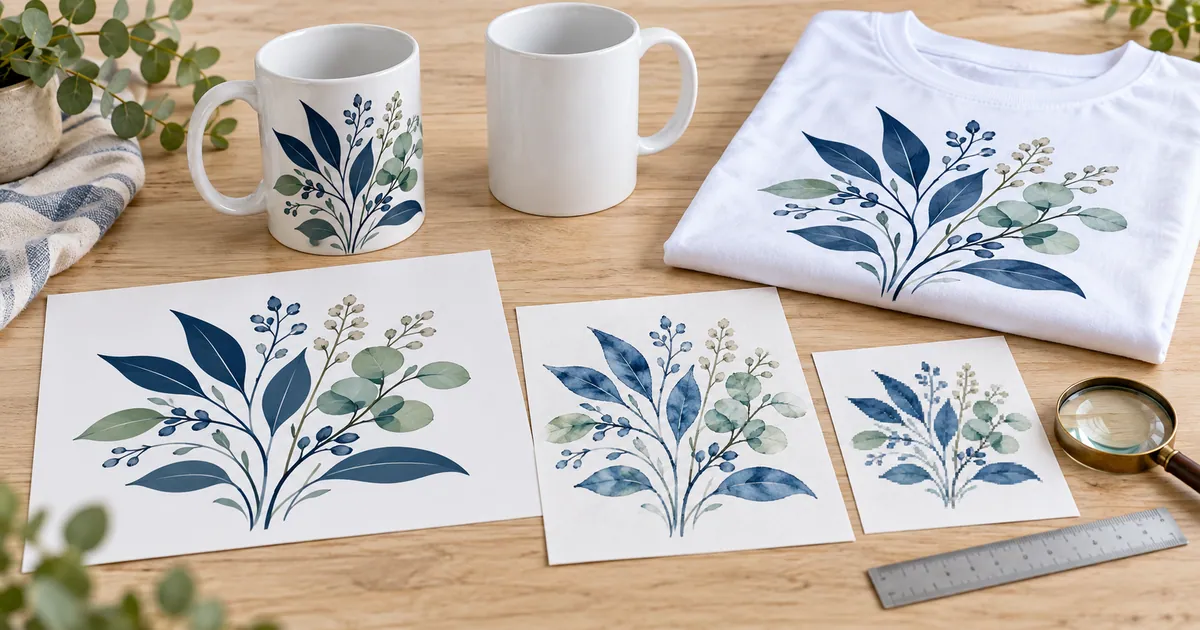
Changing the resolution value without resampling reallocates the same pixels across a different physical size. It does not create missing detail. Upsampling adds estimated pixels, which can make an image larger in pixel dimensions while leaving the original fine features unresolved. A small graphic therefore needs a larger original or a simpler planned placement when it cannot support your intended area.
Keep the aspect ratio locked when resizing. For example, a 2400 × 3000 image has a 4:5 ratio; at 8 inches wide it is 10 inches tall. Stretching it to a square changes the shape of the illustration. If your blank needs a different ratio, crop deliberately, leave appropriate space around the artwork or choose another composition.
Compare the shirt artwork ideas with the chest area you plan to use. A tall illustration does not automatically become a wide banner when it has enough pixels. For a full wrap, check the blank’s dimensions and any tapered outline too; file resolution and template shape solve different problems.
Open the Actual File and Build a Final-Size Proof
Make the first inspection in the application you will use for the layout. Check that the artwork opens with the intended appearance, that required elements are present and that any font or embedded-image issue is resolved. Then inspect the smallest important detail at the planned size: fine lettering, an eye, a border or an intricate leaf can reveal a problem that the overall thumbnail hides.
- Write down the intended blank, printable dimensions and the edits you need before choosing a download.
- Read the file list and open the actual artwork. Distinguish it from a preview or staged mockup.
- Check PNG transparency, JPG backgrounds or SVG contents according to the format you received.
- Record the raster pixel dimensions and calculate the physical size at the PPI required by your workflow.
- Place the art inside the correct template with its proportions preserved. Inspect any cropped text or details.
- Print an actual-size paper layout with page scaling disabled and measure it. Use this to judge fit and readability, then follow the blank supplier’s transfer instructions.
A paper proof is a layout check, not a prediction of sublimated color. Keep the original download and save the adapted layout separately so you can revisit the source when another blank needs different dimensions.
Checklist Before Using a Sublimation File
- The included format opens correctly in your layout software.
- The supplied file is artwork rather than only a mockup or preview.
- The background is transparent or opaque as intended.
- Any required personalization is supported by the actual contents.
- Raster dimensions meet the chosen print size and PPI target.
- The visible motif has enough pixels after margins and cropping are considered.
- The aspect ratio is preserved and the composition fits the exact blank.
- Fine details remain clear on an actual-size paper layout.
Find Designs for Your Project
Choose the visual direction, then compare each file’s format and dimensions with your own layout.
- Mug sublimation artwork — compare full wraps with other drinkware compositions
- Artwork ideas for custom tees — check finished illustrations against your intended chest print
- Small keychain gift designs — look for a composition that stays useful in a compact layout
Frequently Asked Questions
Is every PNG file transparent?
No. PNG supports transparency, but a particular file can contain a fully opaque background. Open the actual image against a contrasting temporary background and inspect its edges before relying on transparency.
Does 300 DPI mean a PNG can print at any size?
No. Its pixel dimensions still limit how much detail it can provide at a chosen size. Divide pixel width and height by the target PPI to calculate the corresponding physical dimensions.
Can an SVG contain a pixel-based image?
Yes. An SVG can include a raster image such as a PNG or JPG. Vector shapes may scale cleanly, while an embedded raster component remains dependent on its own pixel dimensions.
Are JPG and JPEG different choices for transparency?
They refer to the same common image format, which does not support alpha transparency. Choose it when its photographic content or intentional background suits the layout, and inspect the delivered image quality.
Choose the File That Supports Your Actual Layout
Start with the print dimensions and changes you need, then verify the file’s contents. The extension, pixels and editable elements each answer a different question; checking all three makes it easier to choose artwork that fits your project.